Risk & Sensitive Data Discovery with Sampling
Curriculum
Help & Support
Click here to view a quick video introduction to Product labs.
Click here to view our library of common issues and troubleshooting tips.
Click here to reach out to our support team with your questions.
Overview
This Guided Tour provides an overview of solution that Innovate Inc.'s received using Core Data Discovery & Risk Insights.
Lucy Armstrong, working as a business analyst, finding it very difficult to locate the sensitive data in various repositories. The major problem is, critical and confidential files. She discussed the issue with Emma Frost who is business owner. Both of them were looking for a solution and came across OT Core Data Discovery & Risk Insights. OT Core Data Discovery & Risk Insights can locate the sensitive data stored across multiple locations. Data will be identified based on sampling template. Once the data is discovered, we can take desired actions on the same. This template includes the Sampled, Regulatory, Financial, Legal, and Cascading categories. Let’s see how to proceed!
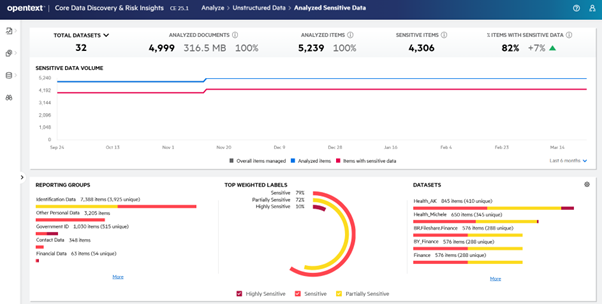
Above screen displays the data discovery capabilities of Core Data Discovery & Risk Insights which is an advantage in this case.
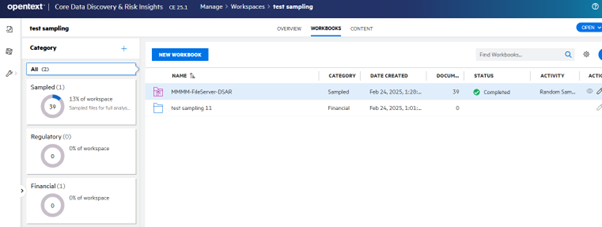
Here we are able to see that the random sampling has been done and sensitive files are identified.

The actions are mentioned under File Actions section on the right side. We can take desired action by simply clicking on it.
About Guided-Tours
Guided-tours are a safe and engaging way to learn, without the complexity and infrastructure requirements of a full scale implementation. Each tour is designed to simulate the real application using interactive HTML to guide you step-by- step through the exercises, in exactly the same way you would work with a live system. And as instructions are embedded into the guided-tour, there is no need for a detailed workbook for this lab - the following pages are therefore provided just to give you some helpful hints about how to get the most out of the Guided-Tour application (Walnut)
Hyperlinks and Guides
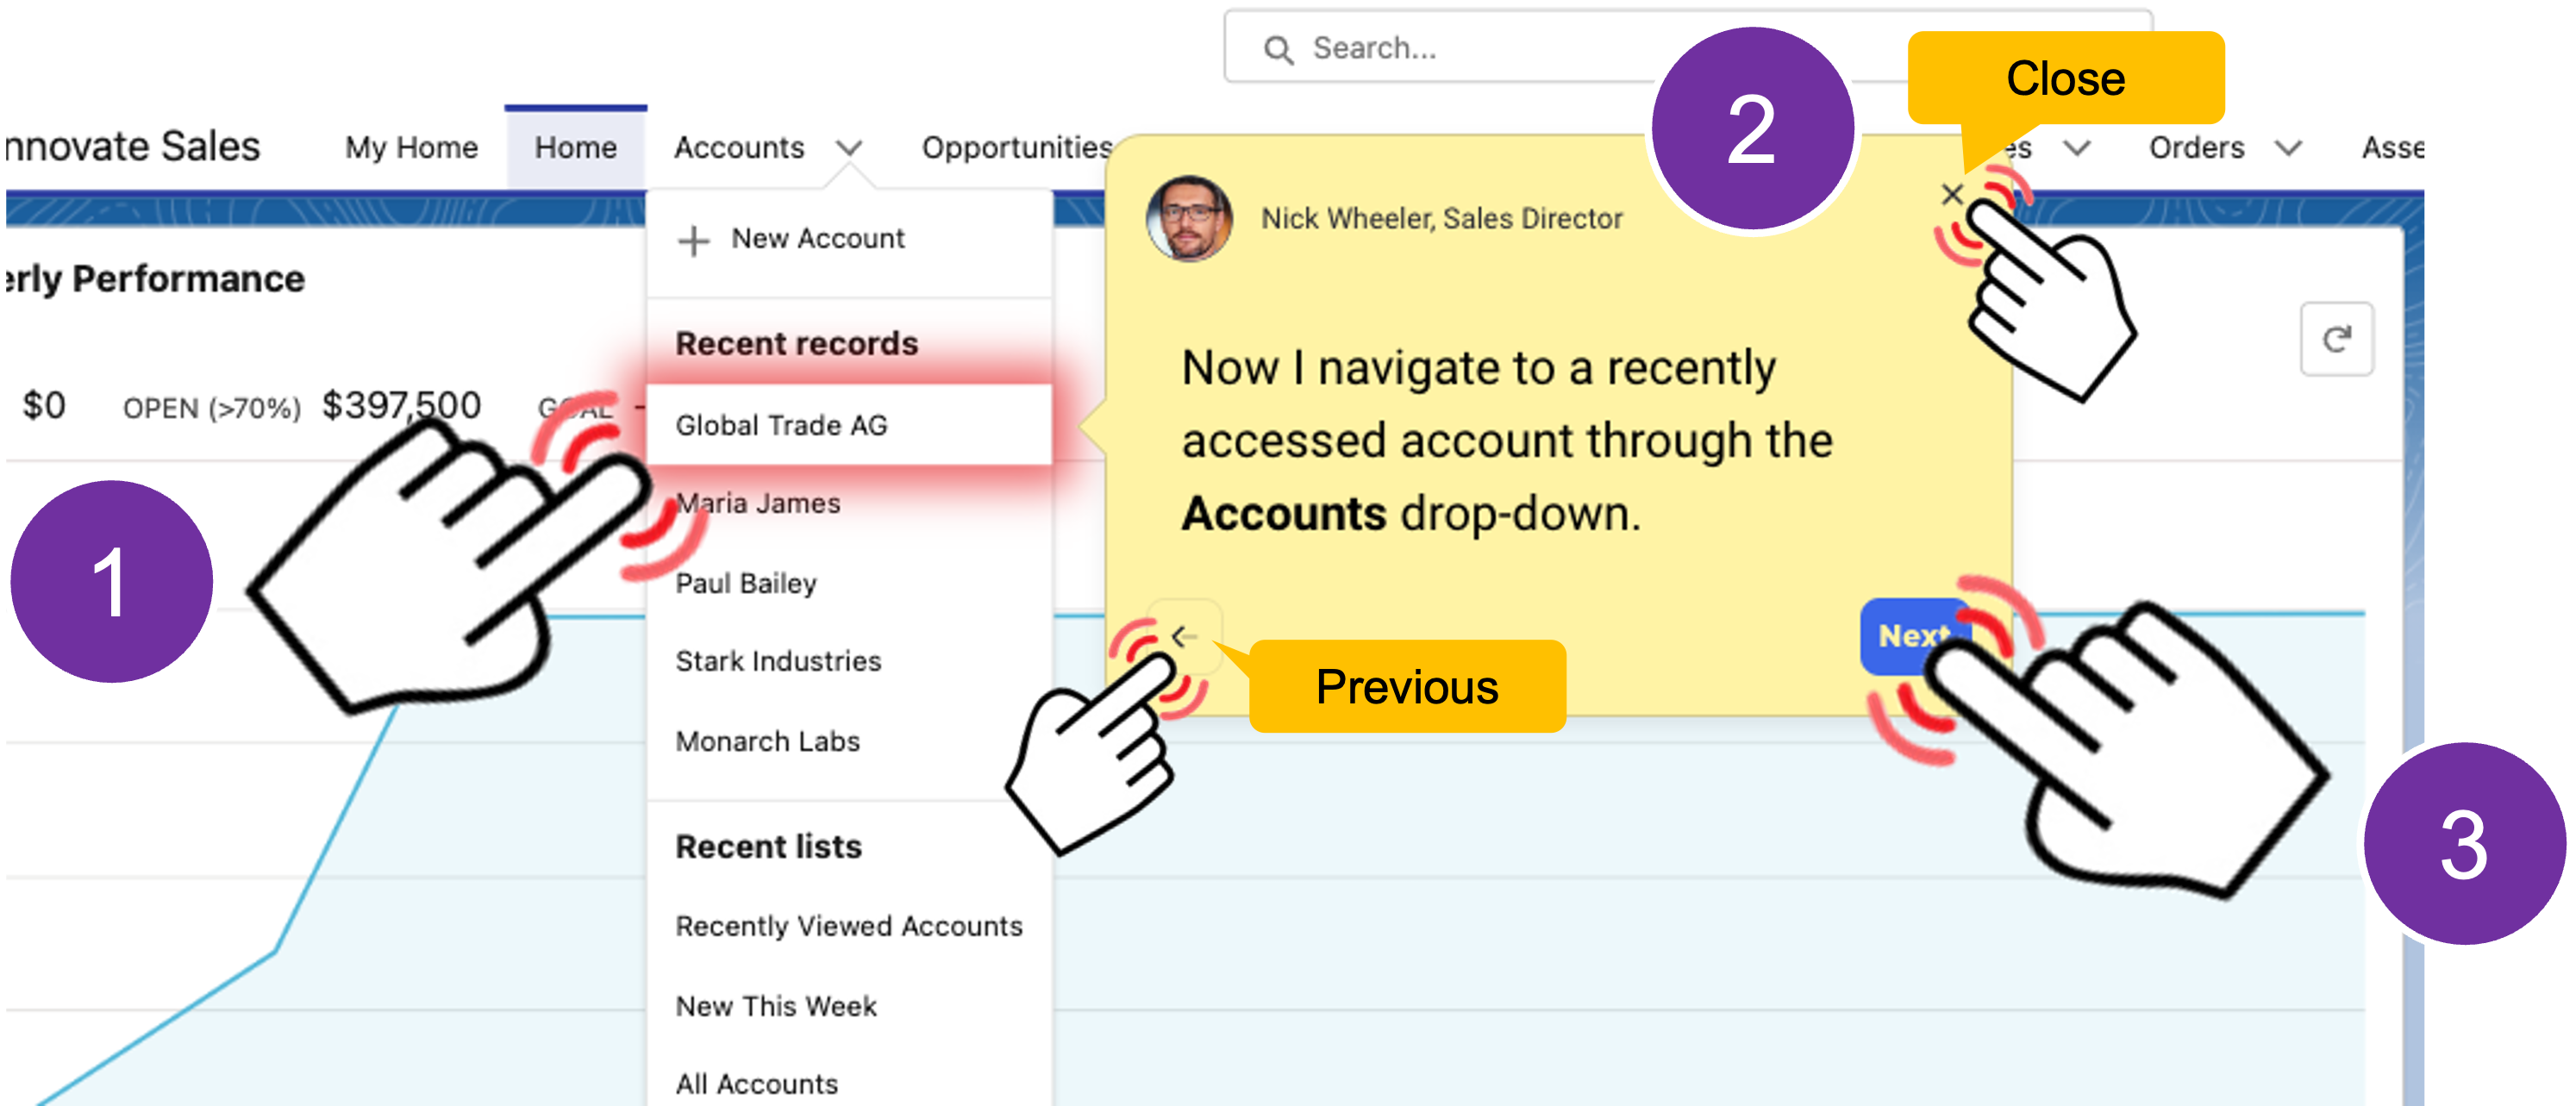
Walnut allows our engineers to capture the experience of a real-product by adding interactive links to HTML screens from the actual product. For example, when an operator clicks on a menu option, he/she is taken to the next screen in the sequence. The only difference therefore, between what you see on a click-tour and what you would see in the live application, is that your path through the sequence of screens is pre-scripted.
To make it easy to follow, we’ve added high-lights on the screens showing you where to click, and captions to help you to understand what's going on.
Using the navigation bar
Each tour is comprised of a number use-case scenarios. You can run through the scenarios in order, or use the navigator provided at the bottom left of each screen to open the table of contents to jump into a specific use case.
If you get lost, or if you want to jump to a different place in the lab, just remeber to use the navigation menu to take you where you want to go.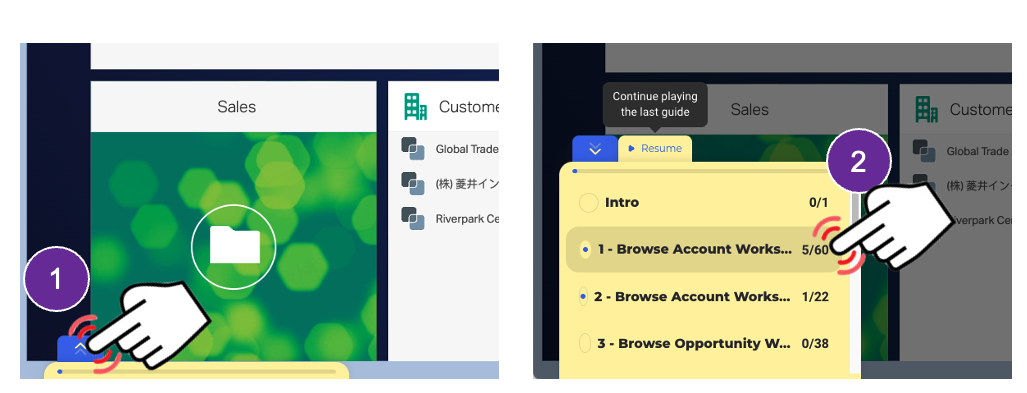
Walnut has built in responsive design enabling the tour to auto-size to your browser window – we do however, recommend that you maximize your browser window for the best experience.
That’s all there is to it!
- Microsoft Edge, Mozilla Firefox or Google Chrome browser.
- Click-Tours are best viewed on a desktop screen with Full HD (1920 x 1080 or better resolution).